
Sailboat Inspection Tips for Prospective Buyers
"As a sailor judges his prospective ship by a 'blow of the eye' when he takes interest enough to look her over at all, so I judged the Spray, and I was not deceived."
-Joshua Slocum from Sailing Alone Around the World
(Spray was the name of his sailboat)
-Joshua Slocum from Sailing Alone Around the World
(Spray was the name of his sailboat)
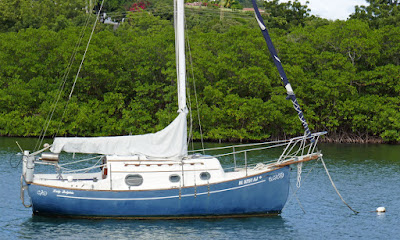
Now that we've got 3 little sailors to raise, we're slowly starting to explore the idea of a bigger cruising sailboat. I say slowly because we're content to take our time and really assess our needs and wants for the next boat. As we move through the process, I thought it would be good to explore the sailboat inspection process, both as a resource for you, the reader, and as a reminder for us, the prospective buyers.
The following information about inspecting a sailboat was adapted from an excellent post and thread over at the forums on Sailnet. The original post and most of the content below was written by Sailingdog (aka Dan) but is being shown here with his permission (Thanks Dan!). I've taken the liberty to adapt and expand on some of the ideas below to reflect my own perspectives and needs when inspecting a sailboat.
 |
| Roll up your sleeves, break out the tools and put on your surveyor's hat! |
Sailboat Inspection Tips for Prospective Buyers
Please note: The following information is about going to visit a boat to see if it is worth looking at further. It is not designed to replace a proper professional survey and sea trial. This type of trip is what you should do to see if it is worth making an offer on a boat and spending the money on a survey and sea trial. Professional surveys are usually still recommended and often required by lenders and insurance companies. However, after following the tips below, you'll unlikely be surprised by anything reported in a subsequent professional survey.
First, put together a kit of tools for your boat visit. The kit should include the following:
- Small Notebook — Reporters notebooks or pocket-sized Moleskines are excellent choices for this.
- Pencil/Sharpie — For making notes and sketches in notebook
- Small tape recorder (smartphone app) — It is often easier to make notes by speaking than by writing when looking at a boat
- Digital camera — A flash is also useful, particularly inside the cabin, lockers, etc.
- Tape Measure — Preferably a 25-30' tape
- Small Flashlight — Preferably LED, like the Gerber Omnivore or Firecracker
- Pocket Multitool — Get a good one, like the Leatherman Surge
- Phenolic Resin Hammer — A small one will do and is used for sounding the hull and deck (see below)
- Small Magnet — Preferably one with a lanyard attachment
- Inspection Mirror — Preferably one with a telescoping handle
- Small Volt-Ohm multimeter — Preferably digital with a rubber casing
- Moisture Meter — See section below
Additional Supplies:
- Clean White Rags
- Awl
- Waterless Hand Cleaner Wipes
- Spray Cleaner (like Fantastic)
- Burgundy Scotch Brite Pad
When you get to the boat, take some photos of the as you approach it. Turn on the tape recorder and speak clearly about your first impressions of the boat. Make sure you get your first impressions down. The human brain is a weird thing and often the first impressions are the best ones... and there's usually a reason for them.
Systematically go through the boat from bow to stern, from top to bottom, recording what you find either on the tape recorder or as sketches and notes in the notebook, and document everything with photos using the digital camera if at all possible. If you have specific requirements, use the tape measure to take measurements.
Don't forget to note the make and model of the various equipment and parts aboard the boat. Some pieces of equipment, like specific models of engines, pumps, and such have known weaknesses and specific problems to be aware of.
The magnet is to be used to check stainless steel hardware. If the magnet sticks, it isn't marine-grade stainless. Austenitic stainless, which covers most marine grade stainless steel, is non-magnetic and includes 304 and 316 grades of stainless. The cheaper martensitic stainless is magnetic.
The flashlight and inspection mirror are used to look in nooks, crannies, deep unlit lockers, the bilge, engine compartment, etc. Looking in lockers and such can often tell you a lot about a boat's true condition, since many people will spruce up and clean the interior of a boat for sale, but will often forget to do the same for the less visible spaces. A good example of what you may find is traces of a visible waterline in the higher lockers which may indicate that the boat was sunk or otherwise flooded at some point.
Tapping the deck with the phenolic hammer near stanchion bases may give you an indication if the deck has started to delaminate or has a wet core. Most boats have a cored deck and stanchions/deck hardware are often places where water intrusion can start due to the loads that they're often subjected to. Caution: If you are not skilled with a phenolic hammer please DO NOT go pounding on an Awlgriped (painted) deck!! These hammers are used for TAPPING not pounding. Most manufacturers do not do a very good job of potting the fasteners or the deck area around the stanchions or other deck hardware, especially on older boats made when water intrusion problems weren't well understood.
Look for cracks in the gelcoat—most spider cracks are normal and often due to the gelcoat being laid too thickly. Parallel cracks in the gelcoat often indicate stressing of the fiberglass. Star-shaped cracks in the gelcoat are usually the result of an impact.
Look for flat spots in the hull or places where the hull doesn't follow a natural curve. These can often be indicators of previous damage or bad construction. Often, places where the hull isn't following a fair curve are due to bulkheads being improperly glassed to the hull and causing a hard spot—which can cause the laminate to bulge along the hard spot and results in the laminate fatiguing prematurely.
Check mechanical systems to see if the parts that should move do, and that the parts that shouldn't move don't. If something sticks, like the tiller, and shouldn't—it is probably an indicator of something wrong or something about to go wrong. Excessive play is often an indicator of wear and that something may need to be repaired or replaced soon. If a cabin door or cabinet door doesn't open or close smoothly, it may mean the hull and deck have changed shape and are causing it to bind—this can often happen if a compression post has started to weaken.
The multimeter can be used to do some quick checks on the electrical system. If you don't know how to use one, take a class at a local vocational/technical school and learn (or use Google and YouTube!) — you need to know how to trouble shoot electrical problems using one if you're going to own a boat.
Go through the boat and open every locker if at all possible. Lift settee cushions. Look in the bilge. Photograph the rig. Get detailed photos of the chainplates, the rudder attachment points, the steering quadrant and other important pieces of equipment. Open ports and dog them back down. Turn on lights, turn them off. Try to turn, pull, open or otherwise operate everything available.
As for the pocket multitool...they're just too damn useful not to have one around.
Don't go aloft on a boat that you're not familiar with, unless the rig is vouched for by someone you know and trust. It is unlikely most owners would let you go up the rig anyway, given the liability issues if the rig should fail and you were to get injured. Additionally, many boats are on the hard when up for sale, and going aloft on the hard is a really, really bad idea IMHO.
Instead, take photos of the rig from the ground or deck. The amount of detail you can pull off of a 8-10 MP image nowadays is astounding, even if the camera only has a fairly short focal length lens.
If you are in the market for a 10k+ vessel do yourself a favor and invest in a moisture meter. It will pay for its self the first time you use it and rule out a boat!!
Surveys run $600+ clams, moisture meters can cost as little as $150 clams. If you found a boat you really loved but the surveyor found moisture you're out $600. However, if you do your own "checking" you can rule out many boats safely without a survey and with each boat you rule out due to severe moisture the meter costs less and less until it's free!
Please do NOT listen to the neigh Sayers like David Pascoe on this subject. He is a surveyor who DOES NOT want you to own a meter. He uses scare tactics and discuses how "difficult" it is to use one. That is complete BUNK! Using a meter, to a level where you can rule out a boat with severely wet decks, takes about a half hour to learn! More accurate and detailed use takes more time but that is not what you are after in this stage.
Trust me, he and his cohorts WANT to survey three or four boats for you before you find one to buy. My buddy Eric surveyed five boats before finding one in purchaseable condition. He spent over 2k in surveys. He could have ruled at least four of these boats out, if not all five, with about a half hours worth of reading and a $150 meter, thereby saving $1700.00!
Specific Inspection Areas
#2 Driveline - On inboard powered boats, grab the prop and wiggle it back and forth up and down. If there is any play the cutlass bearing may be shot and will need replacement. This could get pricey because the job often requires dropping the rudder in order to remove the prop and shaft.
#3 Driveline - Inspect the strut, prop shaft (if bronze) and prop for any signs of dezinctification. This will appear as areas of discoloration more pinkish or coppery in color as opposed to the gold hue of bronze. A Scotchbrite pad is a good thing to add to the inspection kit as it will allow you to get down to bare bronze.
#4 Rudder -Grab the rudder and move it from side to side and fore and aft. If there is significant play the bearings or bushings may be past prime.
#5 Rudder - Move the rudder by hand from full port to full starboard. If you feel any difference in resistance it could be a bent shaft or steering gear issues.
#6 Steering - Inspect the entire steering gear assembly and look for excess play or "meat hooks" on the steering cable. Make sure the wheel brake works. A broken wheel brake, or one that does not have adequate locking to prevent you from turning the rudder by hand, means the rudder was allowed to move freely at the dock or mooring. This is BAD and adds to unnecessary premature wear and tear on the entire steering system.
#7 Steering - Inspect the rudder stuffing box. You are looking for signs of drips or leaks. they will usually run from the top of the rudder packing gland down and will be green in color if it has a bronze rudder packing gland.
#8 Rudder - Look for any rust colored drips emanating from the rudder. This is a good sign of water intrusion. You can also use a hammer to lightly tap the rudder and listen for a dull thud or different pitches which may indicate a wet core.
#9 Keel - Look for any signs of water seepage or discolored stains along the keel to hull joint. Leaking keel joints lead to crevice corrosion of the keel bolts and can be a bad situation.
#10 Keel - Look in the bilge for any signs of un-sealed screw holes, possibly left over from a float switch or bilge pump, with brownish rust stains around them. This could mean the boat has a plywood laminated keel stub that has been moisture saturated. If the stub has wood and it's wet the keel bolts will likely be suffering from a good deal of crevice corosion.
#11 Keel - Look at the keel bolts and make sure there are no circular stress cracks emanating outward from the backing plates. This is another sign of a rotting and compressing keel stub. Solid fiberglass does not compress enough to create circular stress cracks.
#12 Bulkheads - Using an awl (please be courteous and do this in an inconspicuous area that can not be seen) poke the areas around the chain plates lightly. If the wood is rotten the awl will sink in. Do the same around the bottoms of the bulkheads where they meet the bilge.
#13 Glassed in Bulkheads - Inspect all tabbing and make sure NONE of it is peeling or broken free from either the hull or the bulkheads. Do your best to look at the entire mating surface. This will usually require the flashlight and inspection mirror. If you notice any discoloration of the wood, lightly poke at it with the awl. Look for any signs of the teak veneer bubbling or lifting. This is always a red flag for moisture in the bulkheads.
#14 Screwed in Bulkheads - Many production boats used bulkheads that are screwed in place. Make sure the screws are entering at a 90 degree angle to the wood. Screw heads that are cocked or off the 90 degree angle, and if there are more than just the occasional one, are a good indication the bulkhead has been over stressed and has moved.
#15 Deck (Under-side) - Do your best to remove anything that will get you to the backing plates of deck hardware. Please do not dismantle the boat! This is only for areas of easy access. If you can unzip a headliner for example, and the zipper does not stick, visually inspect deck penetrations for any signs of "coffee drips". Any brownish drips or brownish colored stains dripping from through-bolted hardware or any holes on the underside of the deck are signs of a seriously deteriorating rotting deck. If you see "coffee drips" in more than one location walk away and find another boat..
#16 Seacocks - Visually inspect the "balls" from outside with a flashlight and look for any signs of corrosion. If they have handles that turn like your hose spigot at home you know that they will need to be replaced because they are gate valves. Real seacocks should have handles that turn only vertically to be in-line with the valve and horizontally to be in-line with the hull only. Turn the handles and visually make sure the balls are opening and closing from outside the boat and make sure they turn freely. Check for a UL Marine rated listing and dezinctifacation (coppery pinkish coloring)
#17 Seacock Backing Blocks - Poke these with the awl. If they are soft they are likely wet and will need replacement. The awl should not "sink in" under light pressure.
#18 Hoses - Visually inspect hoses, including exhaust hoses, for any signs of dry rot, cracking or reinforcement wire bleed or break through. If you see rust spots mid-hose this is a good sign that the reinforcing wire is rusting inside the hose. Check for double hose clamps at all below-water fittings. Also check to make sure there is no clear, un-reinforced hose that leads to any through hull fitting.
#19 Engine - Check the oil and make sure it was recently changed and that it is clean and not black. An owner that puts a boat away, or lists one for sale with dirty oil is also an owner that does not maintain the vessel to a good standard!
#20 Engine - If you've checked everything else, and are a VERY SERIOUS BUYER, remove the engine/heat exchanger zinc and make sure there actually is one and that it is in good condition. DO NOT do this with the boat in the water and the seacock open and do not do this if you are tire kicking this vessel. Ideally this should be left to the surveyor but most don't do this!
#21 Engine - Using a clean white rag, wipe under the engine any where you can reach. If you find a drip, record it in the notebook and jot down it's location. Turn the rag to a clean spot and continue. Many owners will spot clean an engine to hide oil leaks. The rag trick usually finds them.
#22 Engine - Wiggle the engine and visually inspect the motor mounts for dry rot or oil degradation. Make sure the motor mounts are still working and not cracked.
#23 Engine / Fuel - If the boat is equipped with a fuel/water separator device such as a Racor, use an empty Coke bottle to crack the petcock and drain off just a touch of fuel. If it is laden with sediment or all you get is water this is a bad sign. Do NOT drain the entire bowl just a quick crack of this petcock will show you what you need to know and won't require the owner re-bleeding the engine. Be polite and clean up ANY fuel drip with the spray cleaner you brought. Even ONE drop is being impolite...diesel stinks!!!
#24 Winches - Rotate the winches and make sure they rotate freely and smoothly. Wiggle them side to side, especially if they are aluminum. There should be NO play in the drum. Any play in an aluminum winch is a good sign that the bearing mating surfaces are worn or corroded due to dissimilar metals corrosion. DO NOT overlook this, winches are big $$$!
#25 Blocks/Sheaves - Make sure all blocks and sheaves rotate freely and are not frozen.
#26 Running Rigging - Look for any signs of chafe and wear, especially halyards. Scratch the surface of the line's jacket with your fingernail and if threads give way or break it is time for new running rigging.
#27 Portlights - Look for any visibly signs of leaking. Open and close each one to ensure proper operation.
#28 Lifelines - Look for rust / corrosion at the fittings and between the white jacket of the wire and the swaged fitting.
If the boat owner doesn't want/allow you to do this... it may be that they are hiding something. A boat owner who is proud of how well kept and maintained his boat is should have no problem allowing you fairly complete access to the boat and its systems.
Once you've gone over the boat with a fine tooth comb, walk the docks and talk to the other marina residents. They can often give you a lot of information about the boat.
- Was it used regularly or was it a dock queen?
- Did the owner come out to check the lines and fenders before and after a storm?
- Did the owner have regular maintenance done to the boat?
- How long has it been for sale?
All this stuff can often be discovered just by being friendly and talking to other people at the marina.
Put everything aside for a day and then come back and look at it. This gives your subconscious mind a chance to process what you've seen and things that you may have not realized on the initial trip may jump out at you.
If you get a hunch about some equipment or part on the boat, look at your photos and notes about them and see if you can figure out what your subconscious is trying to tell you.
Don't forget to do a bit of research on the various pieces of equipment you saw on the boat to find what specific problems are common to them.
If you really like what you saw and didn't come across any glaring warning signs, it is probably time to make the offer. When you make your offer, ask for maintenance records, and make the offer subject to survey and sea trial.
Remember, if you're married or have a significant other... GET THEIR INPUT! If you don't it up front you're sure to get it sometime after the purchase!
If you're hungry for more inspection tips, consider purchasing Don Casey's book titled, Inspecting the Aging Sailboat:
Happy sailboat hunting!
>> Ready to start shopping for your next cruiser? Visit SailFarYachts.com to browse voyaging sailboats for sale. <<

And if the boat is for sale in Massachusetts in the coming weeks, check carefully for bullet holes and bloodstains.
ReplyDeleteBrilliant post! We're heading to the States soon to start looking for our next boat. This list will sure come in handy. Thanks for sharing!
ReplyDelete